Monday, August 14, 2017
The utility bedroom
Progress on the utility room continues and is actually going according to schedule! Although, keeping on schedule has been more work than anticipated at times. The goals for the past weekend were paint and cement board. The primer coat went pretty quick but did take almost 3 gallons of paint. After that was done, we only had a small break (lunch) and it was time to start putting some color on the ceiling and walls. I had forgotten how much work it is doing all the hand work for the ceiling to wall corners. This room had some interesting challenges in that the ceiling in most areas isn’t high enough to stand on the platform without hitting my head, but just high enough to make it a reach without the platform. This also makes it fun when using a roller, with a long handle, you’re baning into things, and without, you’re stretching. Another small break while the ceiling drys before trying to cut in for the walls.
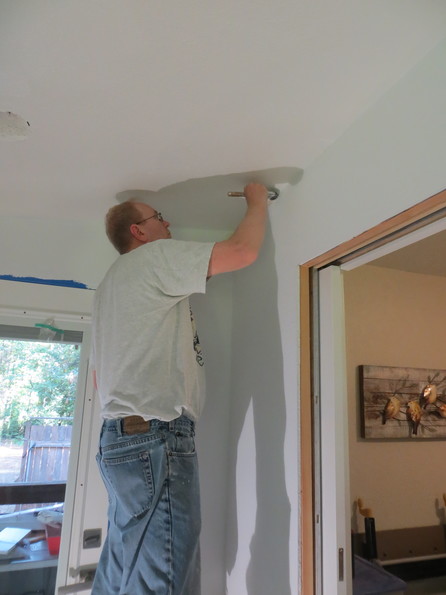
We’ve not had good luck getting the wall paint to cover in one coat. It almost does, but leaves lots of spots where it seems to pull away or shrink as it dries. With a second coat on the wall, we call it done.
Next we install the cement board on the floor. Getting it cut and placed isn’t too bad, but then we have to screw it all down. That’s a lot of screws!
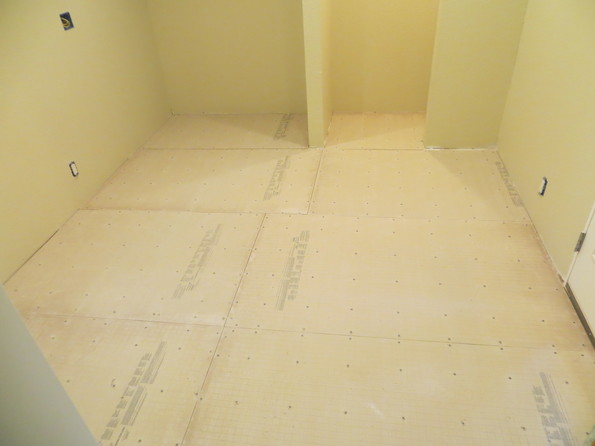
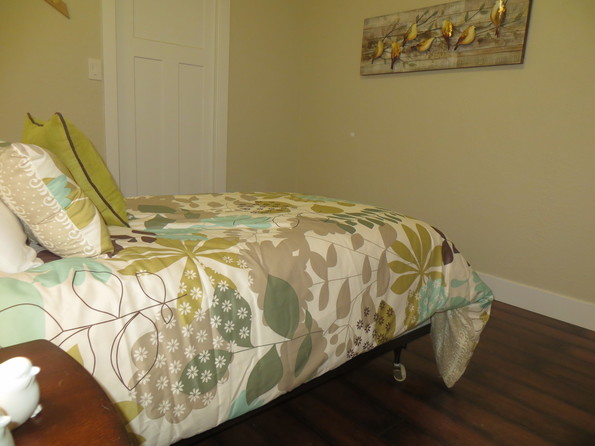
Some thinset on the all the seams and it should be ready for tile. But that’s going to have to wait. We need the guest bedroom back as a bedroom so eunwieldlyverything has to be moved back into the utility room. We do spend some time trying to organize it a little so it’s not a complete mess. The cardboard floor covering in the bedroom has served it’s purpose and was looking pretty bad, so we pulled that up and finally get to see what the room really looks like now.
Since most of the rooms have been completed, it was time to start working on a way to show the dramatic changes that the have taken place over the past 4 years. One of the ideas was to duplicate many of the original photographs and show before and after photos for each room. There are still a couple of room missing, but the results are available from the menu on the right. This also prompted a review of the main website for the cabin photos. Using the photo gallery for the main web pages and menu is getting a little unwieldy and there have been some issues with the photo gallery in general; like the thumbnails don’t look very nice and it doesn’t work well when viewed on a mobile browser. After reviewing a number of different photo gallery packages for the web, there are two that seem to work best. One is a revamp of the existing code. The thumbnails are cleaned up and the photos properly set to display with the right orientation on all browsers. The second is a fairly complex database driven package. While the complexity of using it is higher, it does offer some nice features like display of the camera info and the ability to allow comments to be posted for the photos. Both versions are available from the menu on the right. To finalize this, a new main cabin web page needs to be created. One thought is to use is blog as the main page and use the menu on the right to access all the different sub sections. If you have any thoughts on this, please leave a comment.
Todo list
Utility Room
-
Fix ant infested ceiling joist -
Get roof fixed/replaced -
Replace electrical boxes -
Add recessed lighting - Figure out washing machine drain
- Replace dryer vent
-
Frame new closet -
Seal up the room -
New insulation -
New drywall -
Texture drywall -
Paint walls and ceiling -
Prep for tile floor - Tile floor
- Grout floor
- Window and door trim
- Base boards
Monday, July 31, 2017
Joint compound and ice-cream
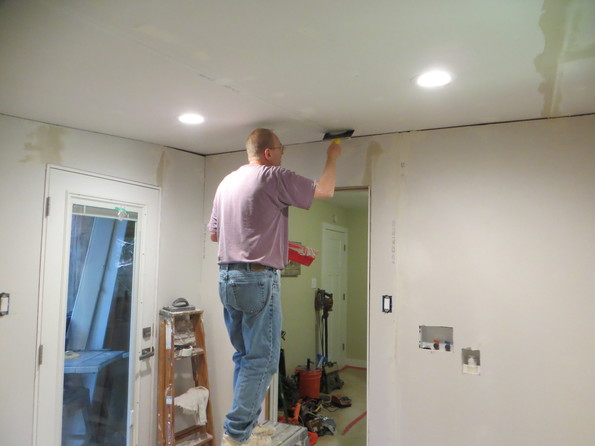
For once we got more done than we planned! Usually it’s the other way around and everything takes 4 times longer than planned. Maybe we’re not as picky about the walls and ceiling in the utility room, but we managed to get all the joints taped and sealed in one day. We definitely didn’t smooth out the joints as well as we had for the other rooms, but after laying down a bunch of texture, it really didn’t seem to matter.
So tape and two coats of joint compound left to dry overnight followed by a light sanding.
While waiting for the first coat to dry, we had time for a trip to One-Eyed Jacks for ice-cream.
Cover the doors, window, outlets/switches and give it a good spraying with texture.
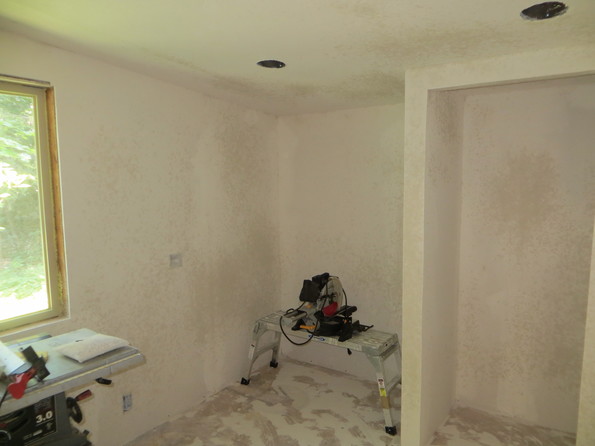
We had everything cleaned up and put away by mid afternoon.
Todo list
Utility Room
-
Fix ant infested ceiling joist -
Get roof fixed/replaced -
Replace electrical boxes -
Add recessed lighting - Figure out washing machine drain
- Replace dryer vent
-
Frame new closet -
Seal up the room -
New insulation -
New drywall -
Texture drywall - Paint walls and ceiling
- Prep for tile floor
- Tile floor
- Grout floor
- Window and door trim
- Base boards
Monday, July 17, 2017
Rebuilding the utility room - part 2
Insulation and drywall supplies were procured and the walls of the room were insulated. Remaining progress was on hold while we waited for the new roof and ant damage repair. The main reason for waiting was because the last two recessed lights needed to attached to the damaged roof/ceiling joist. Once the repairs were complete, progress continued full steam ahead!
The two remaining lights were installed and wired up. The insulation was installed in the ceiling.
Since we were replacing the drywall on the ceiling and since we’re no longer youngsters who feel confident holding a full sheet of drywall over our heads while attempting to screw it in place, we opted to use a drywall lift. Turns out you can buy these for almost no money. A new drywall lift, capable of lifting a sheet of drywall 11 ft. in the air was delivered for $119 total. Assembly wasn’t too hard and it worked really well for the 2 (yes only 2) full sheets of drywall we put on the ceiling.
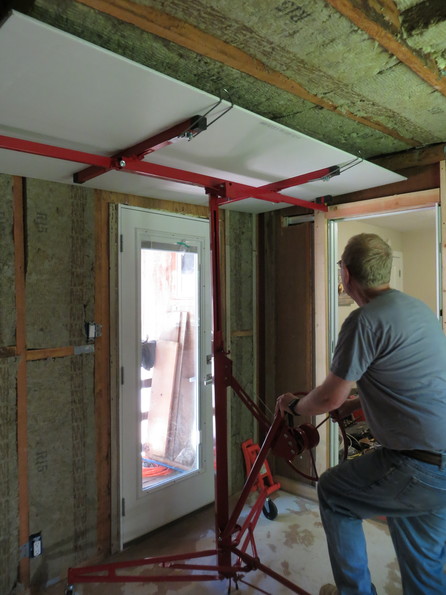
We kept the lift in place while cutting out the opening for the recessed lights and didn’t worry at all that the sheet may sag or fall.
The rest of the ceiling needed smaller pieces that were easy enough to hold while screwing them in place.
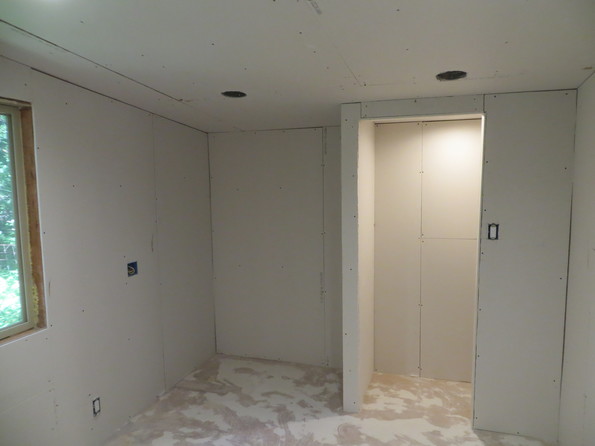
The room was not designed at all to make drywall installation easy. In fact, you’d be hard pressed to design a room that would make drywall installation more difficult. There is no single wall area where a full 4×8ft. sheet could be installed. The ceiling slopes from front to back and at it’s tallest, it’s 2” shy of 8ft. The studs are not arranged so that a 4ft. or 8ft. piece will have both ends land on a stud. Thus every single sheet had to be cut at least once, most had to be cut twice and many 3 times. Four of the pieces had to have holes cut for electrical/plumbing boxes. When we started it was taking about one hour to hang one sheet. That improved slightly by the end. We finished the weekend with a white room.
Todo list
Utility Room
-
Fix ant infested ceiling joist -
Get roof fixed/replaced -
Replace electrical boxes -
Add recessed lighting - Figure out washing machine drain
- Replace dryer vent
-
Frame new closet -
Seal up the room -
New insulation - New drywall
- Texture drywall
- Paint walls and ceiling
- Prep for tile floor
- Tile floor
- Grout floor
- Window and door trim
- Base boards
Wednesday, May 31, 2017
Rebuilding the utility room - part 1
Luckily, the ants are mostly gone. There were a few returning scouts crawling around so they were pretty easy to deal with.
This week, we come out of the closet. Or more specifically, we actually build a closet. Originally, the utility had a closet that spanned the entire back wall. In our revised designed, the closet is a bit smaller to make space for cabinets and counter space. The existing closet was added after the room was finished so the closet walls butted up to the drywall (and same on the ceiling). We wanted to mostly keep one of the small wall sections, but that meant modifying to fit against the wall and attach to the ceiling joist for stability. While doing this, we noticed that the wall is about 3/4 of inch out of plumb. To finish off the closet framing we added another small wall. The new closet layout is about half the size of the original.
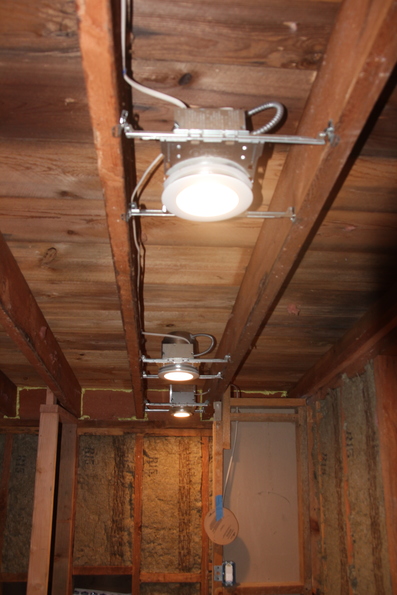
Next on the list was electrical. After some of the problems we’ve encountered previously, we elected to just replace all the boxes. All the switch/outlet boxes were removed and replaced with new. The existing room light was replaced with recessed LED lights (well 2 of the planned 4 were installed). A new switch and recessed LED light was added for the closet because who wants a dark closet. A new outlet box was installed above where the counter will go to provide a convenient source of power for computers/desk accessories. All new switches and outlets were installed.
Lastly, we started on sealing up the space. Some of the big gaps at the back were spray foamed as was the gap around the door. Started installing insulation. We had about 1 1/2 packages left so used that up. 4 new packages should be waiting for pickup next week.
My original plan for replacing the ant infested ceiling joist was flawed. For some reason I thought that it was on hangers both front and back, failing to realize that the back of joist goes through the wall and provides the overhang. Thus I picked up a replacement that is too short by about a foot.
We had someone out to give us a quote for a new deck and also asked for quotes on fixing the ant damage and staining the house. His suggestion was to remove the roofing, pull the nails out of that one joist, replace the joist, fix the roof boards and re-roof. That’s probably what we’ll do, but now we need to know how much and when. Until that’s fixed, we can’t really do much more on the utility room.
With the utility room work on hold we focused on the outside. We racked up a tailer load of yard waste and hauled it down to the burn pile. Probably have 2 more trailer loads to go before the yard is all cleaned up.
Todo list
Utility Room
- Replace ant infested ceiling joist
- Get roof fixed/replaced
-
Replace electrical boxes - Add recessed lighting
- Figure out washing machine drain
- Replace dryer vent
-
Frame new closet - Seal up the room
- New insulation
- New drywall
- Texture drywall
- Paint walls and ceiling
- Prep for tile floor
- Tile floor
- Grout floor
- Window and door trim
- Base boards
Monday, May 22, 2017
Demo day
We’re in the home stretch as far as the interior remodel goes. We started work on the last room. The “utility” room was an addition added sometime in the 80’s, we think. It has the washer/dryer hook-ups and a fairly large closet. We’ve been using the room as a storage room. Well that changes starting now!
We moved everything out of the room and into the bedroom and moved the beds from bedroom to the recently finished upstairs. Once the room was emptied out, it was time to get started. Here’s the room once we emptied it out.
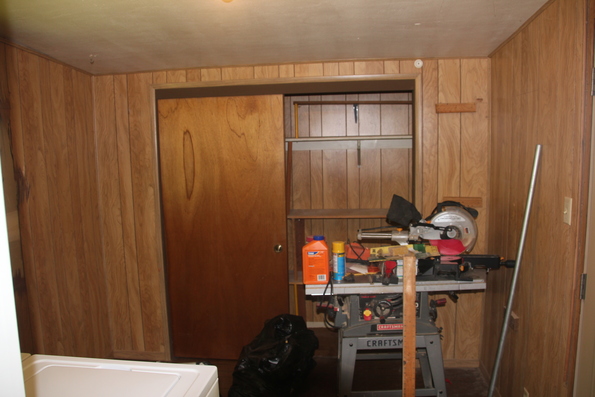
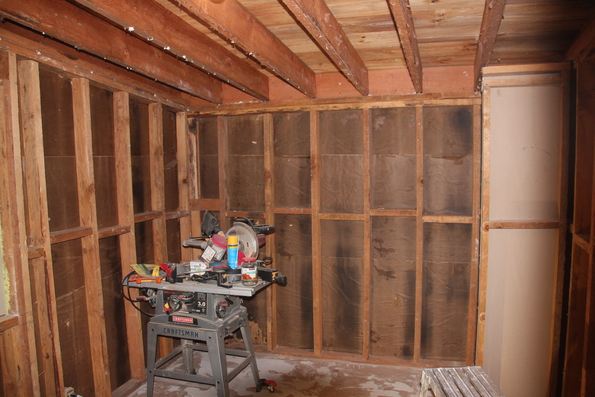
We started by removing all the paneling and closet doors. The room seemed to brighten up a bit with all the dark paneling gone. Then it was time to punch some holes in the walls and start ripping out drywall. Things start getting messy with all the dust. We did find one decent size wasp nest in the wall. As we opened up the walls, the smell of mouse/rat piss got quite a bit stronger. When we were working on the common wall between the bedroom and the utility room we did find some mouse carcases. So the smell was not totally unexpected. Taking the ceiling down was a real treat. Much of the insulation had turned to dust so as sections of the drywall came down, so did piles of insulation dust. There were also quite a number of small wasp nests in the ceiling.
Then we found the carpenter ant nest. Again, not unexpected. There were ants in the bathroom when we opened that up. There were some ants up above the bathroom wall and below the window (likely had been a leak there) and we had opened a small bit of the utility room ceiling a while back because of ants. It looks like the flashing on the addition roof was leaking for a while and the ants had moved in. One ceiling joist looked pretty chewed up. We started by spraying it down with carpenter ant killer and the ants started dropping like flies. Well they dropped from the ceiling to the floor to the point where the floor looked alive. Our missing became, kill the ants.
Over the course of the next 24 hours, we’d poke at the nest, rile up the ants and spray them, then step on the ones that drop.
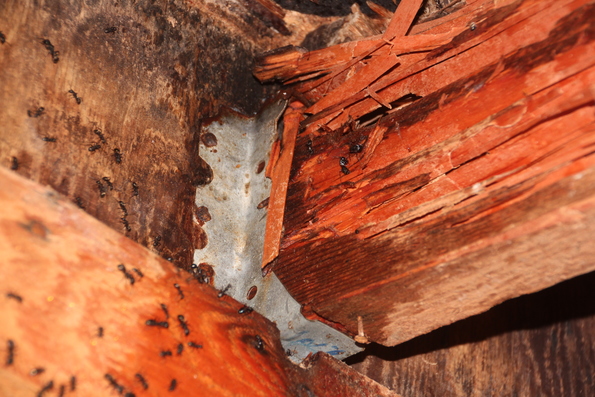
After a few rounds of this, the number that drop each time has dwindled. The big question is what happened to the queen? Working around the ants, we managed to get all the insulation out of the ceiling and walls. With the room mostly cleaned out, we hauled it all off to the dump (ants included). The last thing to be removed was the floor covering. With that gone, we now have a clean slate.
Todo list
Utility Room
- Replace ant infested ceiling joist
- Get roof fixed/replaced
- Replace electrical boxes
- Add recessed lighting
- Figure out washing machine drain
- Replace dryer vent
- Frame new closet
- Seal up the room
- New insulation
- New drywall
- Texture drywall
- Paint walls and ceiling
- Prep for tile floor
- Tile floor
- Grout floor
- Window and door trim
- Base boards
- Install new ceiling fan

