Monday, May 1, 2017
It’s a new room!
It’s been a while since the last update so it was time to get back at it.
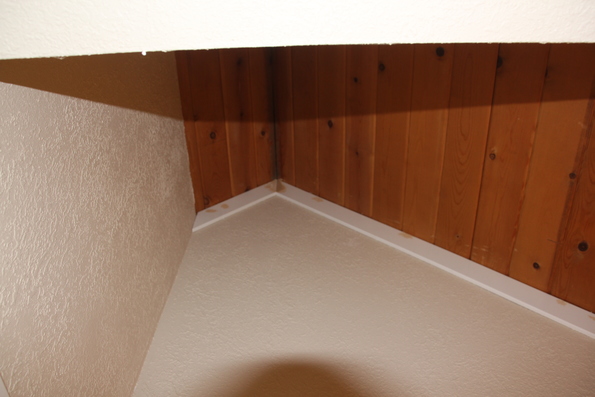
The upstairs is essentially finished. There’s still caulking all the trim, but you have to be in the right mood to caulk. There’s also the back bedroom ceiling fan and front bedroom closet door. It took pretty much a whole weekend to finish up the trim. This was all the ceiling to wall trim which means that there’s a lot of work on the ladder near the peak of the cabin. Did I mention that I don’t really like ladders? Being at the top of a tall ladder that’s sitting at the top of a stairway is the worst. Not only is it a long way down to the bottom of the stairs, but it cramped and hot. I’m really glad that’s done.
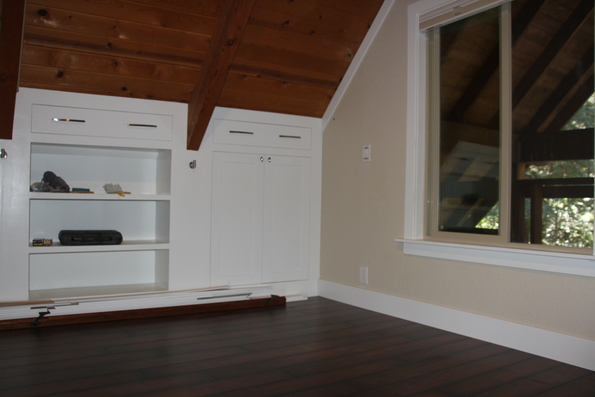
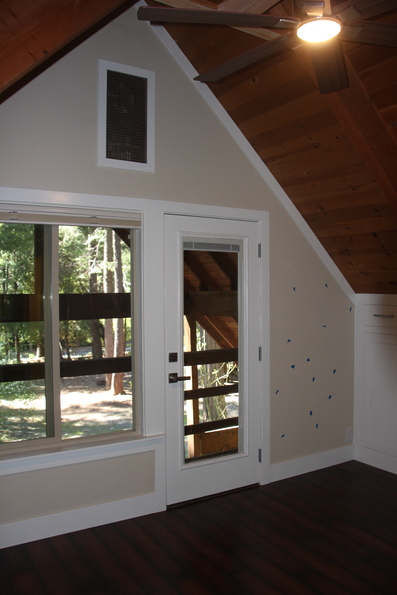
With the trim complete, it means no more cutting, which means we can finally clean up the front bedroom. It’s been a construction zone for so long it’s quite amazing to see it cleaned out and almost ready for furniture.
Todo list
Back bedroom
-
Dog cubby baseboard -
Dog cubby outside trim -
Figure out knee wall design -
Knee wall door trim -
Build/install bookcase -
Install hangers for clothes -
Install drawer carcasses -
Install drawer boxes -
Install drawer trim -
Install baseboard -
Trim wall to ceiling corners - Install conduit for ceiling fan — almost finished
- Build new ceiling fan mount
- Install new ceiling fan
Front bedroom
-
Paint balcony door -
Frame knee walls -
Trim knee walls - Door for closet
-
Bookcase for knee wall -
Dresser Drawers -
Cabinet doors for knee walls -
Install baseboard -
Install wall to ceiling corner trim -
Install conduit for ceiling fan -
Build new ceiling fan mount -
Install new ceiling fan -
Install grill cover for vent fan -
Install window blind
Tuesday, February 21, 2017
Transformations
Over the course of a weekend, the front bedroom transformation is almost complete. A majority of the time was spent getting the cabinet doors installed. Each set of doors is unique in size and were all built at home without the ability to test fit anything. The expectation was that they would need a bit of tweaking to get them to fit. Turned out some needed more tweaking than other. This is where the sloping ceiling became a real challenge. When creating the openings, the verticals are plumb. The horizontal, especially the top, are not and follow the ceiling to try and be visually pleasing. In fact, over the door opening (which is just less than 3 feet wide), the worse dropped nearly a 1/2 inch. In other words, the door openings are not square. The doors were created square. The fix, was to trim the tops and bottom of the doors to match the open. But that makes the doors too short. After trimming, they then needed to be built back up.
The rectangular doors for the trapezoidal opening:
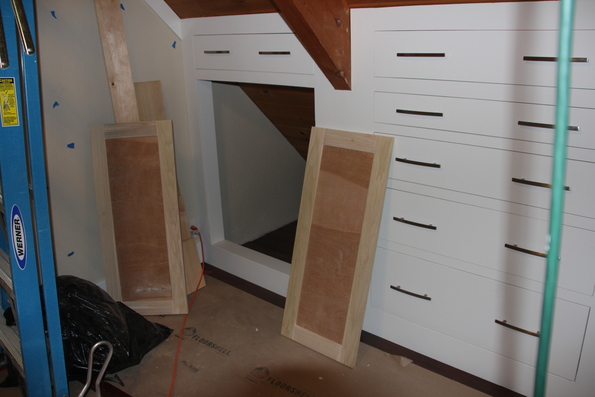
It was really just the one set of doors that needed all that work. The others just needed a bit trimming to get the fitting right.
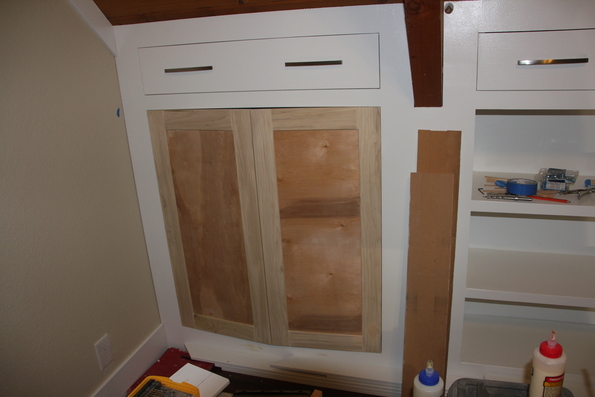
By late afternoon the doors where fitting and ready for primer. The next morning, we were able to put the finish coat of paint on the doors and then install them in the afternoon. After spending a bunch of time adjusting each hinge to get the doors aligned, I should have kept track of which hinge went where, but I didn’t so most needed to be re-adjusted after painting.
At this point, the room is almost complete and you can start to get a good sense of what it will look like.
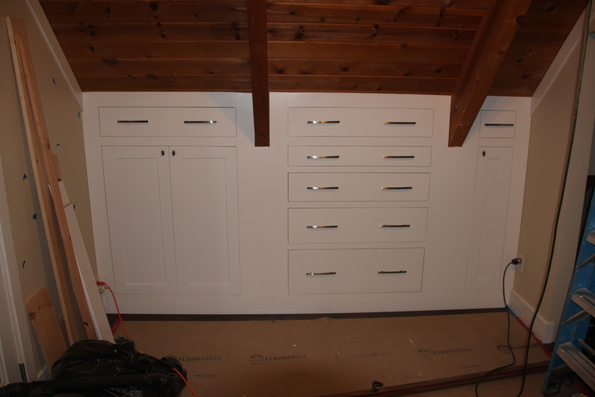
The rest of the weekend was spent on a couple of smaller tasks. We installed the one remaining wall/ceiling trim piece and the window blind. We also removed the existing ceiling fan and mount. A new mount now needs to be fabricated and the new ceiling fan install. If all goes well, the next weekend trip should result in the final transformation of the front bedroom.
Todo list
Back bedroom
-
Dog cubby baseboard -
Dog cubby outside trim -
Figure out knee wall design -
Knee wall door trim -
Build/install bookcase -
Install hangers for clothes -
Install drawer carcasses -
Install drawer boxes -
Install drawer trim -
Install baseboard - Trim wall to ceiling corners
- Install conduit for ceiling fan — almost finished
- Build new ceiling fan mount
- Install new ceiling fan
Front bedroom
-
Paint balcony door -
Frame knee walls -
Trim knee walls - Door for closet
-
Bookcase for knee wall -
Dresser Drawers -
Cabinet doors for knee walls -
Install baseboard -
Install wall to ceiling corner trim - Install conduit for ceiling fan
- Build new ceiling fan mount
- Install new ceiling fan
- Install grill cover for vent fan
-
Install window blind
Monday, February 6, 2017
Built in dresser drawers, part 2
For the built-in dresser drawers in the front bedroom, I reviewed the process for the back bedroom and tried to improve on it a bit. For the carcass, I used a more traditional approach of sides, top, bottom, and dividers. This made each of the openings a bit more consistent than the individual boxes used in the back bedroom. It also makes it much quicker to build and uses less wood. However, the bottom drawer of this dresser is quite a bit smaller than those in the back bedroom. Because of the size, trying to transport some of the pieces would have been difficult.
I also made some minor changes to the drawer boxes. For the back bedroom I used a dovetail jig and attached the front and back to the sides using half blind dovetails. This makes for a very strong joint, but the plywood didn’t allow for clean cuts of the pins. For the front bedroom I used a variation no a locking miter joint. This should be plenty strong but doesn’t look quite as nice. However, it takes less time to make.
For the back bedroom, I built all the drawer boxes at home and transported them up. For the front bedroom I just cut everything and hauled them up flat.
It took about 1 1/2 hours to build the four boxes and they all fit without any issues.
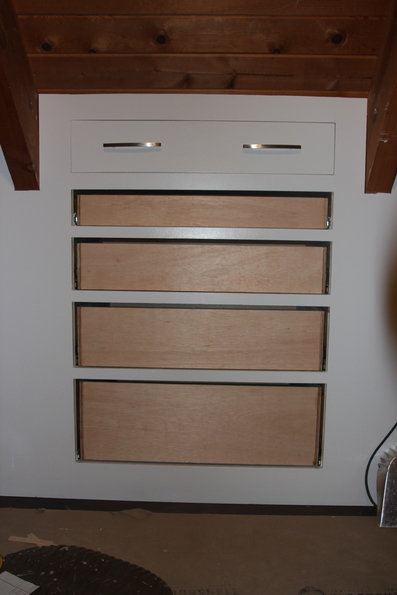
It probably took another hour to install the boxes.
The drawer faces took longer. Mostly because using pine with knots meant having to fill around the knots and wait to sand. Then there was primer and paint that had to dry. The bottom drawer face took even longer as it is about 12 1/2” wide. Wider than any of the standard pine boards. So it needed two boards joined together with biscuits to get the width. So add glue drying time to the total. The results:
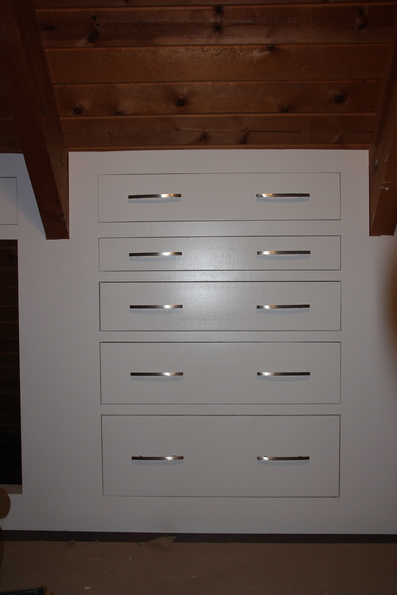
In addition to the dresser, the wall / ceiling trim got a second coat of paint at the joints so it looks finished now. And the base boards were installed. There are only a couple of things left; cabinet doors and the ceiling fan.
Todo list
Back bedroom
-
Dog cubby baseboard -
Dog cubby outside trim -
Figure out knee wall design -
Knee wall door trim -
Build/install bookcase -
Install hangers for clothes -
Install drawer carcasses -
Install drawer boxes -
Install drawer trim -
Install baseboard - Trim wall to ceiling corners
- Install conduit for ceiling fan — almost finished
- Build new ceiling fan mount
- Install new ceiling fan
Front bedroom
-
Paint balcony door -
Frame knee walls -
Trim knee walls - Door for closet
-
Bookcase for knee wall -
Dresser Drawers - Cabinet doors for knee walls
-
Install baseboard - Install wall to ceiling corner trim (one piece to go)
- Install conduit for ceiling fan
- Build new ceiling fan mount
- Install new ceiling fan
- Install grill cover for vent fan
- Install window blind
Tuesday, January 17, 2017
It all looks the same to me….
Checked a couple of things off the list this weekend. We started by finishing up the tip-out drawers. Having done this before made the process go really smooth. Fit the drawer faces, install the hinges, build the drawers, paint the drawers, install the drawers. Being able to do 3 at once made it go relatively quick. But still, it took a day to get them finished. While waiting for fill and paint to dry on the tip-out’s, the trim was filled, sanded and painted.
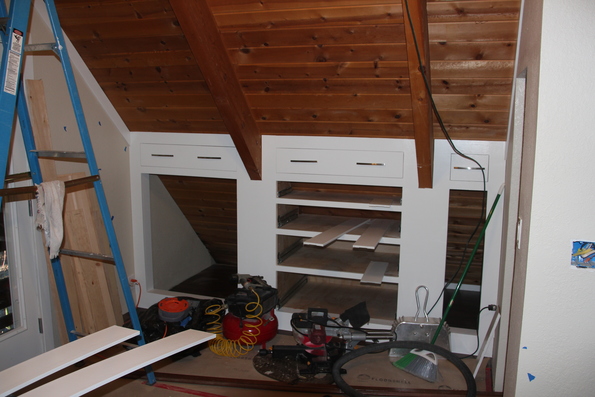
While painting the bookcase, I noticed that the back was not really attached in the middle. I thought I had glued this, but apparently, it didn’t take without some mechanical fasteners to hold it in place. It’s a tight fit, but possible to crawl back behind the bookcase. So with a few screws, the back is now solid.
Since we did have to wait a bit for both filler and paint to dry, we used the opportunity to clean up the room a bit. You can’t really tell from the pictures, but we cleared out most of the scrap wood and move out some of the other supplies that we shouldn’t need up there anymore (which is undoubtedly wishful thinking).
The last to be done for the kneewalls are the doors and drawers and those will be built (or at least cut) at home. So it was on to the rest of the room trim. We had stacks of trim that was just waiting for installation. The baseboard had been sitting out on the deck to keep it out of the way. Unfortunately, even though it’s mostly protected from the elements, some of it still got wet and swelled. There was almost enough usable to do the room, almost.
There is one disadvantage to having all the various trim boards on-hand for months before using them. We’re using 3 types of trim boards; 5” plain baseboards, 3 1/2” plane door/window casing, and 3 1/2 baseboard. The 3 1/2” baseboard is being used to trim the wall to ceiling junctions as shown below.
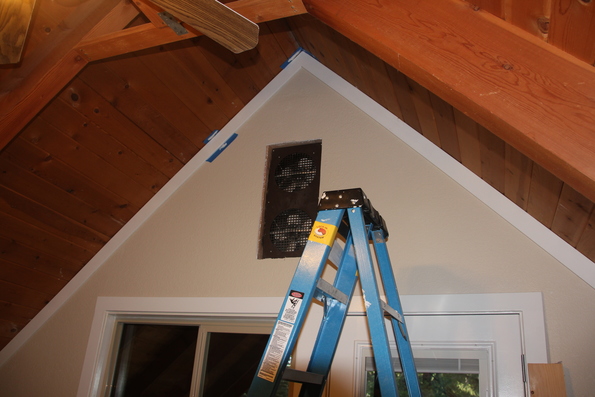
It looks good, doesn’t it? That’s attempt #2. The differences between 3 1/2” casing and 3 1/2” baseboard are subtle. The casing is a bit thicker and has a round-over on both sides. When they’ve been sitting together for months (years?), you tend to forget that. Attempt #1 had almost all of the ceiling/wall trim done with casing before realizing that we were using the wrong trim. In our defense, it was after dinner and the casing was at the top of the piles.
Todo list
Back bedroom
-
Dog cubby baseboard -
Dog cubby outside trim -
Figure out knee wall design -
Knee wall door trim -
Build/install bookcase -
Install hangers for clothes -
Install drawer carcasses -
Install drawer boxes -
Install drawer trim -
Install baseboard - Trim wall to ceiling corners
- Install conduit for ceiling fan — almost finished
- Build new ceiling fan mount
- Install new ceiling fan
Front bedroom
-
Paint balcony door -
Frame knee walls -
Trim knee walls - Door for closet
-
Bookcase for knee wall - Drawers and doors for knee walls
- Install baseboard
- Install wall to ceiling corner trim
- Install conduit for ceiling fan
- Build new ceiling fan mount
- Install new ceiling fan
- Install grill cover for vent fan
- Install window blind
Monday, December 12, 2016
Small victories
The back bedroom knee walls are finished. The last of the drawer fronts were cut, painted, and installed. This is kind of a big deal as it represents a significant milestone in the upstairs remodel. The room isn’t yet finished, as we want to replace the ceiling fan and the structure that the fan is mounted to. We also want to add some trim along the wall/ceiling joints to clean things up a bit.
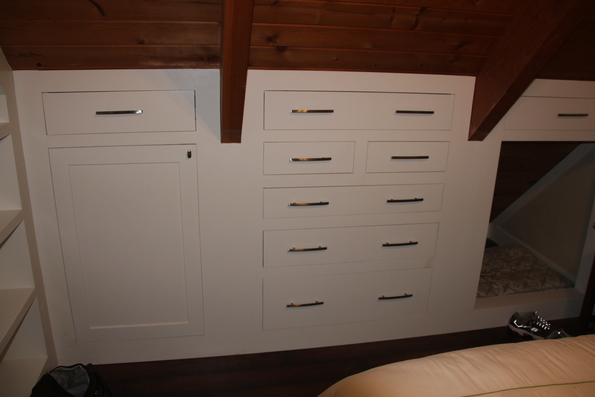
But sometimes a small victory is all it takes. It was beginning to feel like the room would never be finished. Building the drawers took so many weeks that we thought it would never end.
The focus is now on the front bedroom. The knee wall construction seems to be moving faster here. But work hasn’t started on the drawers for this room yet. I have some ideas on how to make the basic assembly go a git faster and if it works out, it may take only one weekend to get the drawer structure complete. The trim for the bookcase was finished and the trim for the remaining door openings has been assembled.
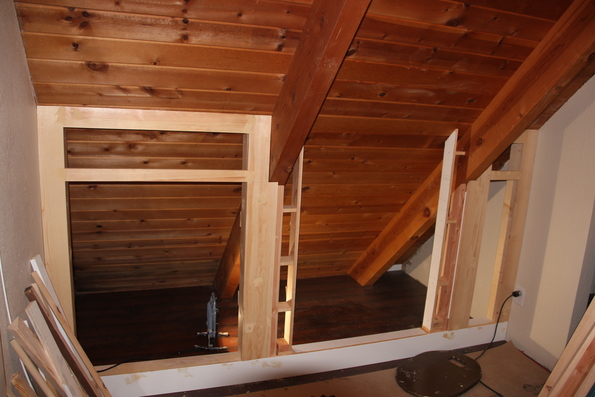
There’s a lot of work that needs to be done at home and that’s always a challenge since there’s no way to double check a measurement or verify a fit. The drawer carcass needs to be cut (and then assembled on-site), the drawers need to be cut (and assembled on-site), the doors (all 7 of them) need to be built.
The weather has been slowing things down some. Painting takes a bit longer and can halt most other construction as it probably isn’t a good idea to create a bunch of saw dust with freshly painted parts in the same room. Because we move the table saw outside to reduce the dust in the cabin, we can’t rip cut anything when it raining. and rain it did. It rained pretty much non-stop all day Saturday. Despite that, this weekend it felt like we made good progress.
Todo list
Back bedroom
-
Dog cubby baseboard -
Dog cubby outside trim -
Figure out knee wall design -
Knee wall door trim -
Build/install bookcase -
Install hangers for clothes -
Install drawer carcasses -
Install drawer boxes -
Install drawer trim -
Install baseboard - Trim wall to ceiling corners
- Install conduit for ceiling fan — almost finished
- Build new ceiling fan mount
- Install new ceiling fan
Front bedroom
-
Paint balcony door -
Frame knee walls - Trim knee walls
- Door for closet
- Bookcase for knee wall
- Drawers and doors for knee walls
- Install baseboard
- Install wall to ceiling corner trim
- Install conduit for ceiling fan
- Build new ceiling fan mount
- Install new ceiling fan
- Install grill cover for vent fan
- Install window blind

