Monday, February 6, 2017
Built in dresser drawers, part 2
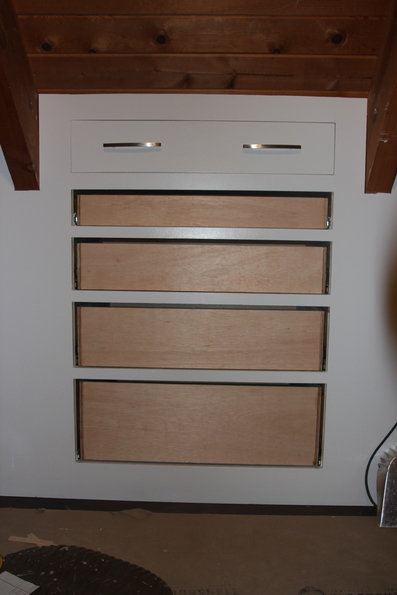
For the built-in dresser drawers in the front bedroom, I reviewed the process for the back bedroom and tried to improve on it a bit. For the carcass, I used a more traditional approach of sides, top, bottom, and dividers. This made each of the openings a bit more consistent than the individual boxes used in the back bedroom. It also makes it much quicker to build and uses less wood. However, the bottom drawer of this dresser is quite a bit smaller than those in the back bedroom. Because of the size, trying to transport some of the pieces would have been difficult.
I also made some minor changes to the drawer boxes. For the back bedroom I used a dovetail jig and attached the front and back to the sides using half blind dovetails. This makes for a very strong joint, but the plywood didn’t allow for clean cuts of the pins. For the front bedroom I used a variation no a locking miter joint. This should be plenty strong but doesn’t look quite as nice. However, it takes less time to make.
For the back bedroom, I built all the drawer boxes at home and transported them up. For the front bedroom I just cut everything and hauled them up flat.
It took about 1 1/2 hours to build the four boxes and they all fit without any issues.

It probably took another hour to install the boxes.
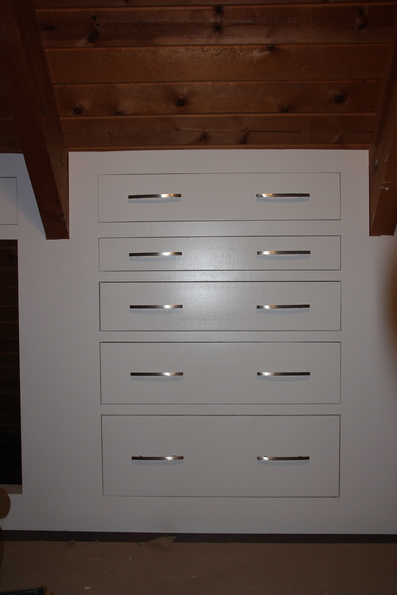
The drawer faces took longer. Mostly because using pine with knots meant having to fill around the knots and wait to sand. Then there was primer and paint that had to dry. The bottom drawer face took even longer as it is about 12 1/2” wide. Wider than any of the standard pine boards. So it needed two boards joined together with biscuits to get the width. So add glue drying time to the total. The results:

In addition to the dresser, the wall / ceiling trim got a second coat of paint at the joints so it looks finished now. And the base boards were installed. There are only a couple of things left; cabinet doors and the ceiling fan.
Todo list
Back bedroom
-
Dog cubby baseboard -
Dog cubby outside trim -
Figure out knee wall design -
Knee wall door trim -
Build/install bookcase -
Install hangers for clothes -
Install drawer carcasses -
Install drawer boxes -
Install drawer trim -
Install baseboard - Trim wall to ceiling corners
- Install conduit for ceiling fan — almost finished
- Build new ceiling fan mount
- Install new ceiling fan
Front bedroom
-
Paint balcony door -
Frame knee walls -
Trim knee walls - Door for closet
-
Bookcase for knee wall -
Dresser Drawers - Cabinet doors for knee walls
-
Install baseboard - Install wall to ceiling corner trim (one piece to go)
- Install conduit for ceiling fan
- Build new ceiling fan mount
- Install new ceiling fan
- Install grill cover for vent fan
- Install window blind

