Tuesday, February 21, 2017
Transformations
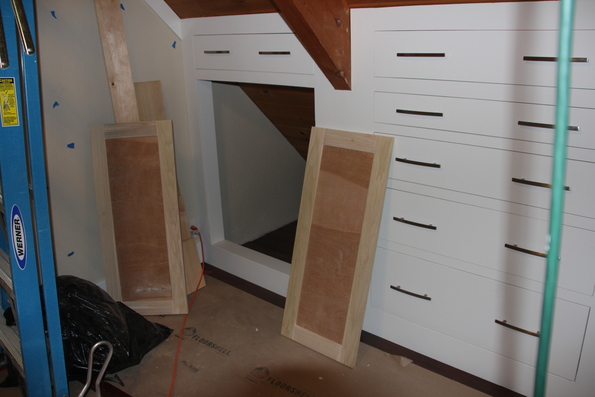
Over the course of a weekend, the front bedroom transformation is almost complete. A majority of the time was spent getting the cabinet doors installed. Each set of doors is unique in size and were all built at home without the ability to test fit anything. The expectation was that they would need a bit of tweaking to get them to fit. Turned out some needed more tweaking than other. This is where the sloping ceiling became a real challenge. When creating the openings, the verticals are plumb. The horizontal, especially the top, are not and follow the ceiling to try and be visually pleasing. In fact, over the door opening (which is just less than 3 feet wide), the worse dropped nearly a 1/2 inch. In other words, the door openings are not square. The doors were created square. The fix, was to trim the tops and bottom of the doors to match the open. But that makes the doors too short. After trimming, they then needed to be built back up.
The rectangular doors for the trapezoidal opening:
It was really just the one set of doors that needed all that work. The others just needed a bit trimming to get the fitting right.
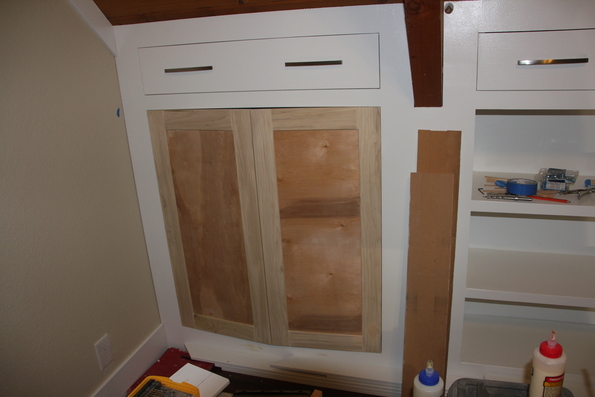
By late afternoon the doors where fitting and ready for primer. The next morning, we were able to put the finish coat of paint on the doors and then install them in the afternoon. After spending a bunch of time adjusting each hinge to get the doors aligned, I should have kept track of which hinge went where, but I didn’t so most needed to be re-adjusted after painting.
At this point, the room is almost complete and you can start to get a good sense of what it will look like.
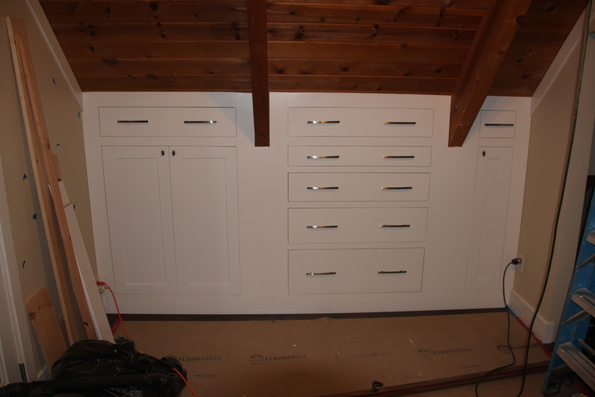
The rest of the weekend was spent on a couple of smaller tasks. We installed the one remaining wall/ceiling trim piece and the window blind. We also removed the existing ceiling fan and mount. A new mount now needs to be fabricated and the new ceiling fan install. If all goes well, the next weekend trip should result in the final transformation of the front bedroom.
Todo list
Back bedroom
-
Dog cubby baseboard -
Dog cubby outside trim -
Figure out knee wall design -
Knee wall door trim -
Build/install bookcase -
Install hangers for clothes -
Install drawer carcasses -
Install drawer boxes -
Install drawer trim -
Install baseboard - Trim wall to ceiling corners
- Install conduit for ceiling fan — almost finished
- Build new ceiling fan mount
- Install new ceiling fan
Front bedroom
-
Paint balcony door -
Frame knee walls -
Trim knee walls - Door for closet
-
Bookcase for knee wall -
Dresser Drawers -
Cabinet doors for knee walls -
Install baseboard -
Install wall to ceiling corner trim - Install conduit for ceiling fan
- Build new ceiling fan mount
- Install new ceiling fan
- Install grill cover for vent fan
-
Install window blind
Monday, February 6, 2017
Built in dresser drawers, part 2
For the built-in dresser drawers in the front bedroom, I reviewed the process for the back bedroom and tried to improve on it a bit. For the carcass, I used a more traditional approach of sides, top, bottom, and dividers. This made each of the openings a bit more consistent than the individual boxes used in the back bedroom. It also makes it much quicker to build and uses less wood. However, the bottom drawer of this dresser is quite a bit smaller than those in the back bedroom. Because of the size, trying to transport some of the pieces would have been difficult.
I also made some minor changes to the drawer boxes. For the back bedroom I used a dovetail jig and attached the front and back to the sides using half blind dovetails. This makes for a very strong joint, but the plywood didn’t allow for clean cuts of the pins. For the front bedroom I used a variation no a locking miter joint. This should be plenty strong but doesn’t look quite as nice. However, it takes less time to make.
For the back bedroom, I built all the drawer boxes at home and transported them up. For the front bedroom I just cut everything and hauled them up flat.
It took about 1 1/2 hours to build the four boxes and they all fit without any issues.
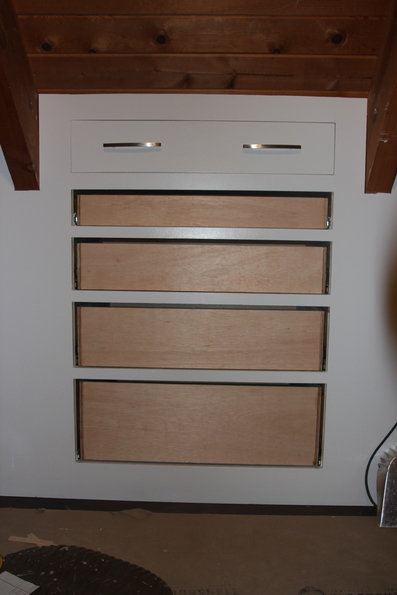
It probably took another hour to install the boxes.
The drawer faces took longer. Mostly because using pine with knots meant having to fill around the knots and wait to sand. Then there was primer and paint that had to dry. The bottom drawer face took even longer as it is about 12 1/2” wide. Wider than any of the standard pine boards. So it needed two boards joined together with biscuits to get the width. So add glue drying time to the total. The results:
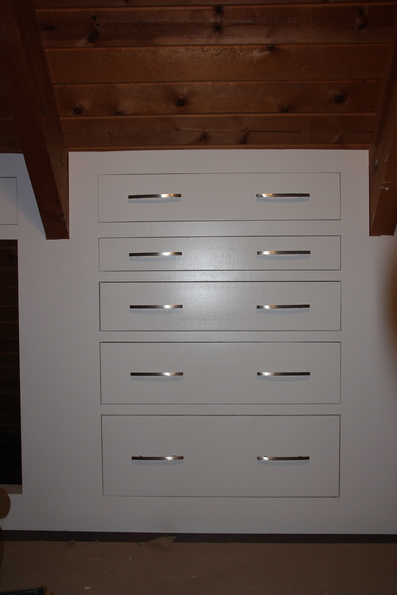
In addition to the dresser, the wall / ceiling trim got a second coat of paint at the joints so it looks finished now. And the base boards were installed. There are only a couple of things left; cabinet doors and the ceiling fan.
Todo list
Back bedroom
-
Dog cubby baseboard -
Dog cubby outside trim -
Figure out knee wall design -
Knee wall door trim -
Build/install bookcase -
Install hangers for clothes -
Install drawer carcasses -
Install drawer boxes -
Install drawer trim -
Install baseboard - Trim wall to ceiling corners
- Install conduit for ceiling fan — almost finished
- Build new ceiling fan mount
- Install new ceiling fan
Front bedroom
-
Paint balcony door -
Frame knee walls -
Trim knee walls - Door for closet
-
Bookcase for knee wall -
Dresser Drawers - Cabinet doors for knee walls
-
Install baseboard - Install wall to ceiling corner trim (one piece to go)
- Install conduit for ceiling fan
- Build new ceiling fan mount
- Install new ceiling fan
- Install grill cover for vent fan
- Install window blind
Tuesday, January 31, 2017
Time for a NAS?
One of my backup drives failed. This is the drive that is primarily backing up the media (music, photos, etc.) so it’s pretty important. The drive was set up as a TimeMachine drive and the media files reside on a USB disk attached to a Mac Mini.
Since I need at least a new drive, this seems like an opportunity to look into replacing the Mac Mini with a NAS device. Looking at some of the low-end NAS devices, it seems like they’ve come a long way since I last looked at them many years ago. They have well thought out user interfaces and some seem to have very good application support.
So maybe this is an opportunity to consolidate and improve a number of the home network functions.
The Mac Mini holds the media, web, and other various archives and serves these out to other machines.
The Linux desktop has database files, and runs the web server, the media server, and a crashplan server so it’s handling a lot different tasks.
There’s also a RPi set up as a VPN server.
Those are all things that a NAS can do, but what should it do?
#1 is file serving. So move all the file serving functions from the Mac Mini to the NAS.
#2 is backups. If possible, run CrashPlan headless on the NAS and point all the other machines at it.
#3 is TimeMachine backups. It should be able to handle local data from each of the Macs
#4 is media server. Maybe even an iTunes server and possibly a Plex server
#5 is a web server.
#6 is a VPN server.
#7 is running the MariaDB database service
#8 What about creating a calendar server?
#9 Would it make sense to make it a mail server too?
Some considerations. While running Crashplan and sending all backups to the NAS seems like a good idea, Crashplan can be a resource hog. Handling the data from the Windows machines is probably easy, but what about the Linux home directory? Some testing is needed. Would it make any sense to move the Linux home directory to the server too?
Media servers can also be a bit resource intensive. Does it make sense to run more than one? There’s a built-in one and there’s Plex. Should only one be run? Is there any advantage to running an iTunes server?
Running the web server on the NAS and the database on the Linux box may cause additional network traffic and performance issues for the web applications that want a database. Of most concern is the power monitoring app as that updates the database frequently. Would it make any sense to run two database servers, one on the NAS handling web applications only and one on the Linux box for the power monitoring.
The biggest concern with hosting all the databases on the NAS is the power monitoring. Would it be possible to run the power monitoring data collection on the NAS? It would need a USB port dedicated for that.
Moving the VPN service over seems like a no brainer.
Hosting a family calendar on the NAS is an interesting idea. It may make a shared calendar between ios and android devices possible.
Moving the mail processing over doesn’t seem to have any advantage or disadvantage. If the NAS isn’t bogged down by everything else, it might be nice to have it handle this too.
The real benefit to using the NAS seems to be that it could free up resources on the Linux box. How much it can handle, we’ll see.
And what NAS am I going to use? A Synology DS216j. This is a dual bay, low end NAS. If it works out well, it’s possible to move up to a more powerful NAS down the road.
Tuesday, January 17, 2017
It all looks the same to me….
Checked a couple of things off the list this weekend. We started by finishing up the tip-out drawers. Having done this before made the process go really smooth. Fit the drawer faces, install the hinges, build the drawers, paint the drawers, install the drawers. Being able to do 3 at once made it go relatively quick. But still, it took a day to get them finished. While waiting for fill and paint to dry on the tip-out’s, the trim was filled, sanded and painted.
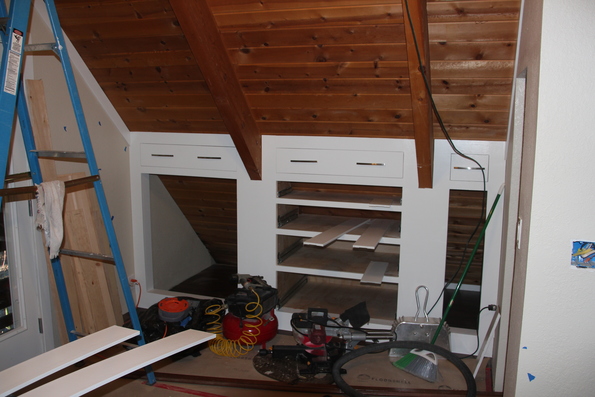
While painting the bookcase, I noticed that the back was not really attached in the middle. I thought I had glued this, but apparently, it didn’t take without some mechanical fasteners to hold it in place. It’s a tight fit, but possible to crawl back behind the bookcase. So with a few screws, the back is now solid.
Since we did have to wait a bit for both filler and paint to dry, we used the opportunity to clean up the room a bit. You can’t really tell from the pictures, but we cleared out most of the scrap wood and move out some of the other supplies that we shouldn’t need up there anymore (which is undoubtedly wishful thinking).
The last to be done for the kneewalls are the doors and drawers and those will be built (or at least cut) at home. So it was on to the rest of the room trim. We had stacks of trim that was just waiting for installation. The baseboard had been sitting out on the deck to keep it out of the way. Unfortunately, even though it’s mostly protected from the elements, some of it still got wet and swelled. There was almost enough usable to do the room, almost.
There is one disadvantage to having all the various trim boards on-hand for months before using them. We’re using 3 types of trim boards; 5” plain baseboards, 3 1/2” plane door/window casing, and 3 1/2 baseboard. The 3 1/2” baseboard is being used to trim the wall to ceiling junctions as shown below.
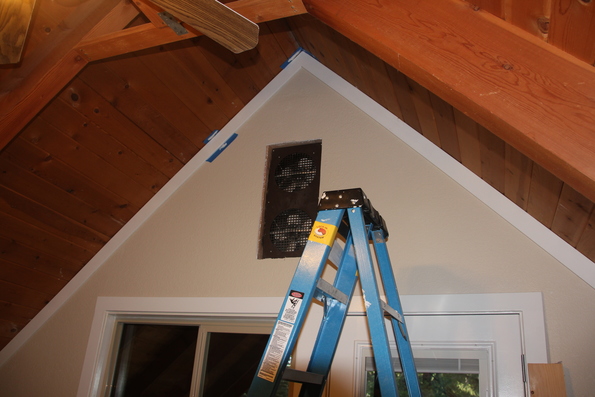
It looks good, doesn’t it? That’s attempt #2. The differences between 3 1/2” casing and 3 1/2” baseboard are subtle. The casing is a bit thicker and has a round-over on both sides. When they’ve been sitting together for months (years?), you tend to forget that. Attempt #1 had almost all of the ceiling/wall trim done with casing before realizing that we were using the wrong trim. In our defense, it was after dinner and the casing was at the top of the piles.
Todo list
Back bedroom
-
Dog cubby baseboard -
Dog cubby outside trim -
Figure out knee wall design -
Knee wall door trim -
Build/install bookcase -
Install hangers for clothes -
Install drawer carcasses -
Install drawer boxes -
Install drawer trim -
Install baseboard - Trim wall to ceiling corners
- Install conduit for ceiling fan — almost finished
- Build new ceiling fan mount
- Install new ceiling fan
Front bedroom
-
Paint balcony door -
Frame knee walls -
Trim knee walls - Door for closet
-
Bookcase for knee wall - Drawers and doors for knee walls
- Install baseboard
- Install wall to ceiling corner trim
- Install conduit for ceiling fan
- Build new ceiling fan mount
- Install new ceiling fan
- Install grill cover for vent fan
- Install window blind
Wednesday, January 4, 2017
Snow Days
This year we decided to ring in the new year at our cabin. For the most part, this was going to be a working weekend, but with the promise of multiple days of snow, it was also an opportunity to play in the snow. The first couple of days brought a dusting of snow so we mostly worked on the front bedroom. With the carcass parts pre-cut at home, we were able to assemble and test fit it without too much trouble. A little bit of trimming in the back was necessary to get a good fit, but it is now ready for drawers. With the carcass in place, the trim could be built, followed by the tip out drawers.
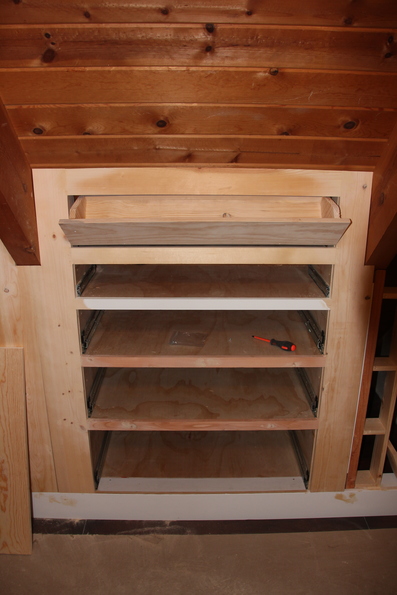
We also built the tip out drawer that fits above the bookcase. With all the trim pieces complete, it was time for paint, one coat of primer and then some trim color and it was ready. All the trim on one side was installed.
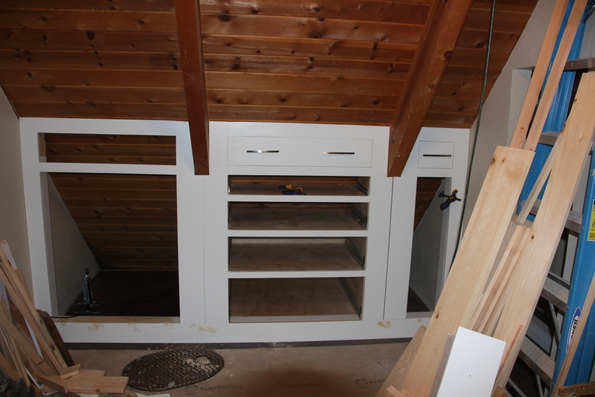
The bookcase trim is ready, but not yet screwed in place. The tip out drawer faces for the rest of the sections were cut and fit, but the drawers themselves still need to be built. All that’s really left is the doors and drawers, most of which will need to be built at home.
We took the opportunity while paint was drying, to go play in the snow. Heading up the hill about 10 miles, we found a good place to pull off and let the dogs run and play in the snow. Sandie did a bit of exploring.

while Duke had fun catching and eating snowballs. After a bit, Sandie was shivering so we packed them up and headed back to the cabin.
We woke up on our last day to find everything covered in snow and the power out. Without any indication of how long it would take for the power to come on and with the snow continuing to fall, we decided it would be best to pack up and head out. But not before driving around the neighborhood and getting some pictures of Merry Mountain in the snow.
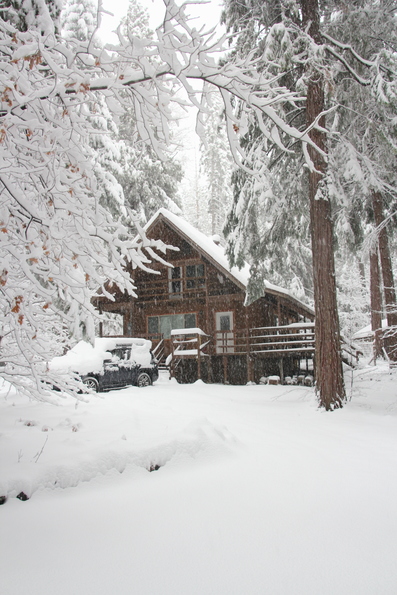
This is the most snow we’ve seen since we bought the place and it really is beautiful. We’re now looking forward to more snow days.
Todo list
Back bedroom
-
Dog cubby baseboard -
Dog cubby outside trim -
Figure out knee wall design -
Knee wall door trim -
Build/install bookcase -
Install hangers for clothes -
Install drawer carcasses -
Install drawer boxes -
Install drawer trim -
Install baseboard - Trim wall to ceiling corners
- Install conduit for ceiling fan — almost finished
- Build new ceiling fan mount
- Install new ceiling fan
Front bedroom
-
Paint balcony door -
Frame knee walls - Trim knee walls
- Door for closet
- Bookcase for knee wall
- Drawers and doors for knee walls
- Install baseboard
- Install wall to ceiling corner trim
- Install conduit for ceiling fan
- Build new ceiling fan mount
- Install new ceiling fan
- Install grill cover for vent fan
- Install window blind

