Monday, August 22, 2016
The sting
Every now and again we need to step outside and do some yard work. This weekend, Genny pulled some weeds/plants from the driveway and we both raked up some leaves, stick, pine cones, and pine needles. Now that we’ve started, it’s more obvious how much more we need to do. I think Labor day will be yard labor day.
A couple of weeks back we noticed (well our guests noticed) a large wasp nest hanging off the shed overhang. Wasp spray was on the list, but we forgot it so the nest is still intact. I guess when I was banging around in the shed looking for a couple of pieces of wood, I woke them. When I left the shed and slammed the door, it must of irritated at least one wasp and it decided to sting me on the back of my arm. A good reminder that we really need to get some wasp spray. Larry, I think I have a job for you up at the cabin … just kidding.
So far, with the drawer boxes, I’ve been building them the same size for each side of the room. We’ll, that’s about to change. The knee walls aren’t identical between the two sides and while the difference isn’t great, it’s enough to cause the top drawers to differ in height by about 1 inch.
A bunch of time was spent measuring the drawer box placement. Since the boxes are built at home then brought on-site to assemble and place, getting good measurements is critical.
This weekend we made the side trim pieces for the center drawer stacks. Again, they are slightly different from side to side. Once we had the trim pieces fitted, we started looking at how the drawer boxes align and what additional work is needed before we can mount the drawer slides. While thinking about this we realized that the tip out drawer above the drawer stack was going to be a problem. For the cubby and storage areas we can get behind the tip out drawer and we needed to do that to reach the hinge screws. With drawers in place, there’s no way to get behind the tip out drawer (and thus, no way to install the hinges). The only solution seems to be to build the drawer trim as a face frame, build and install the tip out drawer in the face frame trim and then, once it’s all built, attach it to the knee wall. At least we figured this out before attaching the trim!
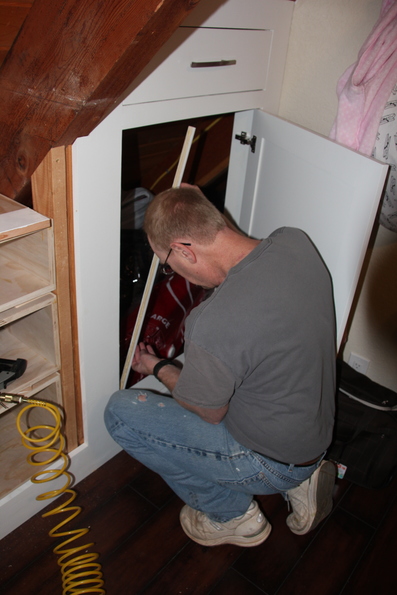
We installed the door stops for the storage area knee wall doors. It’s just a small thing, but now with the doors aligned properly when closed, it just looks so much better.

Back bedroom
-
Dog cubby baseboard -
Dog cubby outside trim - Figure out knee wall design — getting close
-
Knee wall door trim -
Build/install bookcase -
Install hangers for clothes - Install drawer carcasses — a couple are set in place
- Install drawer boxes
- Install drawer trim
-
Install baseboard - Trim wall to ceiling corners
- Install conduit for ceiling fan — almost finished
- Build new ceiling fan mount
- Install new ceiling fan
Front bedroom
-
Paint balcony door - Frame knee walls
- Trim knee walls
- Door for closet
- Drawers and doors for knee walls
- Install baseboard
- Install wall to ceiling corner trim
- Install conduit for ceiling fan
- Build new ceiling fan mount
- Install new ceiling fan
- Install grill cover for vent fan
- Install window blind
Monday, July 25, 2016
Third time’s a charm…
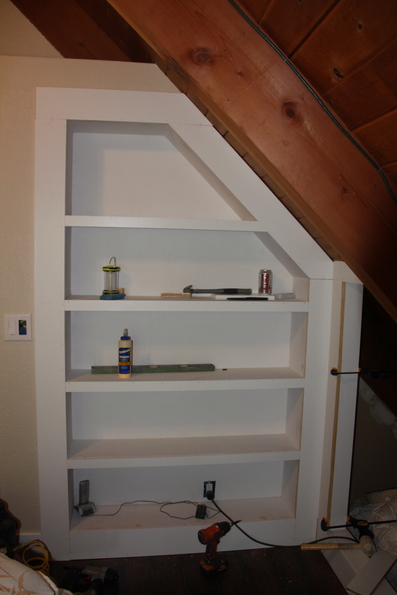
The bookcase was mostly ready for final paint, it just needed the last little bit of filler sanded down and the round-over’s routed. With those tasks complete, Genny broke out the paint and finished it off. It turned out pretty nice.

The south side knee was next on the list. We finished up the tip out drawers on that side and installed the drawer pulls on all the tip out drawers. If you recall from a couple of post back, we had some trouble with the top rail above the outside drawer (the one on the left in the picture below). The first attempt at putting the rail in resulted in the nail to the finger. After that we made some measurements and took the piece home. This is kind of a tricky piece to cut. It’s a 45 degree rip cut with a taper. I didn’t think I had anything up at the cabin that could do that so using the table saw at home we made attempt #2. This one fit good but the taper wasn’t quite right and the drawer opening was more trapezoidal than rectangular. It really didn’t look right. So on to attempt #3. Using bubble gum and duct tape I managed to clamp a guide to the board and cut the 45 + taper using a hand circular saw. This one actually came out right with a nice rectangular opening.

The next task was to run the new electrical for the ceiling fan. The conduit and electrical box will end up being behind the bank of drawers so getting that in place before installing the drawers seemed like the right order. Since the existing ceiling fan and mount will be replaced, The final bit of conduit isn’t finished, but it gets the job done and as a bonus, removes the extension cord that was powering the fan. Note that the extension cord to the fan was not our solution.
We’re cutting the parts for the bank of drawers at home (again, bigger table saw makes cutting plywood sheets much easier) and bring them up for on-site assembly. We’ve also decided that it’s a lot easier to carry the individual parts up the stairs than completed boxes. Three boxes were built and set in place. These aren’t fixed in position yet but will serve the purpose of figuring out drawer slide mounting and trim size. You can see the results in the picture above.
Continued working on the knee walls over the weekend.
Back bedroom
-
Dog cubby baseboard -
Dog cubby outside trim - Figure out knee wall design — getting close
-
Knee wall door trim -
Build/install bookcase -
Install hangers for clothes - Install drawer carcasses — a couple are set in place
- Install drawer boxes
- Install drawer trim
-
Install baseboard - Trim wall to ceiling corners
- Install conduit for ceiling fan — almost finished
- Build new ceiling fan mount
- Install new ceiling fan
Front bedroom
-
Paint balcony door - Frame knee walls
- Trim knee walls
- Door for closet
- Drawers and doors for knee walls
- Install baseboard
- Install wall to ceiling corner trim
- Install conduit for ceiling fan
- Build new ceiling fan mount
- Install new ceiling fan
- Install grill cover for vent fan
- Install window blind
Monday, July 11, 2016
Cabinetry 101
With the knee wall trim work mostly finished, it’s time to start building and installing the “cabinetry” that will make up the storage solutions. The back bedroom will have two open dog “cubbies”, two doors, two drawer units, and 6 tip out drawers.
If you start looking for tip out drawers, most of the information you find is for converting the under sink panels in kitchens and baths to tip out trays. You might also find some information on tip out bins for things like recycling or trash. What we want is a tip out drawer that is somewhere in between those two. Since these will be at the top of the knee wall, they won’t hold much, but we do want to make the best use of that space that we can. Rev-A-Shelf makes some soft close hinges for tip out trays that looked like they would work, but would they handle the weight of a tip out drawer plus contents? We ordered a couple to try out and then built a couple of tip out drawers to test them on.

Looks like they’ll work, but the installation is a bit tricky. Luckily we did this in stages and that resulted in a process that worked. First we cut and fit the drawer fronts. Then we mounted the hinges to the drawer fronts, placed them in the openings and mounted the hinges to the frame. Removed the drawer face from the hinges, built the the drawer part, painted and re-installed. With the drawer fully built, there would not be any way to attach the hinges to the frames while attached to the frame while still being attached to the drawer. So with the first two tip out drawers a success, it’s time to order more hinges.
Having a woodworking shop at home, it only makes sense to build the cabinet doors there. We built the two doors from poplar and made them a bit over-sized so that final trimming could take place on-site. With a little bit of fine tuning, the doors fit nice in the opening.

However, that’s when the problems started. While the face of the knee wall is fairly flat and plumb, the inside edges for the door opening are a little less, what’s the word … precise. It looks like there may be a slight twist in the side which make the top and bottom hinge angle slightly different, resulting in the top and bottom outside edge of the door being off by quite a bit more. The worse door was over 3/4” difference between the top and bottom. Looks like we’ll need to shim the hinges to get the angles matching. If the hinges were mounted to the face frame, this would not have been a problem, but someone thought it would look a bit nicer if the inside of the door opening was a bit more finished looking.
A lot of filling, sanding, and painting has most of the knee wall looking pretty nice.
We also built one of the bottom drawer boxes to see how it would fit and validate the design. The design seems to work (but the box is too big to fit in the back of the SUV, good thing we have roof rack!). The next challenge will be sourcing drawer slides that will work for the extra large drawer. The current design has the bottom drawers at about 35” deep x 41.5” wide x 10 or 11” high. Not a slide you can go down to your local big box store and pick up. The rest of the drawer boxes (and probably drawer’s too) will be transported unassembled and assembled on site, lesson learned.
Back bedroom
-
Dog cubby baseboard -
Dog cubby outside trim - Figure out knee wall design — getting close
-
Knee wall door trim -
Build/install bookcase -
Install hangers for clothes - Install drawer carcasses
- Install drawer boxes
- Install drawer trim
-
Install baseboard - Trim wall to ceiling corners
- Install conduit for ceiling fan
- Build new ceiling fan mount
- Install new ceiling fan
Front bedroom
-
Paint balcony door - Frame knee walls
- Trim knee walls
- Door for closet
- Drawers and doors for knee walls
- Install baseboard
- Install wall to ceiling corner trim
- Install conduit for ceiling fan
- Build new ceiling fan mount
- Install new ceiling fan
- Install grill cover for vent fan
- Install window blind
Monday, June 27, 2016
Nailed it!
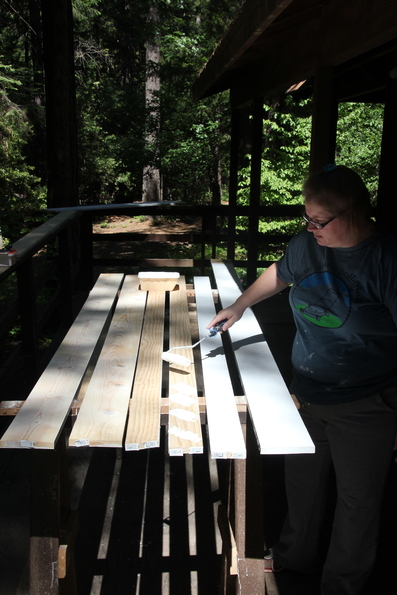
More trim boards, more fill, primer, paint. We tried to get a bit of head start by doing some of knot filling at home so we could start the weekend with trim board primer bright and early Saturday morning. Genny spent a lot of time painting.

While the paint dried … we were able to continue with some of the trim upstairs. We continued working on dog cubby #2 by installing the inside baseboard and ceiling trim. The top horizontal rail wasn’t fitting right and in the process of trying to nail it in place, on nail decided to exit the wood and enter my finger. Not much blood, but it did swell up and was pretty stiff for the next couple of days. Yup, nailed it good! After more fiddling with that top rail we determined that there’s something funny going on with the roof at that point. It looks like the roof boards curl up making the outside about a 1/4 inch higher than the inside, and this is over a 32 inch span. The board is going to need a taper to get the bottom of it level. Everywhere else, things line up pretty good.
Having enough boards and getting them all painted on Saturday make Sunday a productive day. Other than the top rail for the one dog cubby, all four cubbies are trimmed and ready for doors.
We were also able the get the bookcase trimmed (mostly). If you compare with last week where we just installed the carcass, it looks much better with trim.

What you can’t see from the picture is that the last shelf trim board is not attached yet. We ran out of biscuts (one short). You also can’t see all the gaps that need to be filed and sanded.
And one more thing. We had been using the bookcase area as a temporary closet of sorts and hanging clothes there. That obviously won’t work anymore with the bookcase installed so we added some hooks on the wall on other side of the door so we still have a place to hang clothes.
Back bedroom
-
Dog cubby baseboard - Dog cubby outside trim
- Figure out knee wall design
- Knee wall door trim
-
Build/install bookcase -
Install hangers for clothes - Install drawer carcasses
- Install drawer boxes
- Install drawer trim
-
Install baseboard - Trim wall to ceiling corners
- Install conduit for ceiling fan
- Build new ceiling fan mount
- Install new ceiling fan
Front bedroom
-
Paint balcony door - Frame knee walls
- Trim knee walls
- Door for closet
- Drawers and doors for knee walls
- Install baseboard
- Install wall to ceiling corner trim
- Install conduit for ceiling fan
- Build new ceiling fan mount
- Install new ceiling fan
- Install grill cover for vent fan
- Install window blind
Monday, June 20, 2016
Limitations of a narrow stairway
A few months ago (OK, maybe 7), I wrote about the challenges of getting a California King mattress into the upstairs bedroom. To accomplish that we had to cut away some of the balcony railing and hoist it up to balcony and in through the balcony door. That removable railing is proving to be somewhat useful. Because the home shop is better equipped, I built the carcass for the upstairs built-in bookcase there. We then transported it using the amazing Drabbits roof rack on our 4Runner.

Since it’s made out of plywood, it’s not real heavy and it’s only about 4 ft. wide and just over 6 ft. tall. It’s also angled on one side to match the angled ceiling. We can get this up the stairway; no problem, right? Wrong. It was close, but it not close enough. So down comes the railing again. We hoist it up and Genny was able to hold it there while I ran upstairs, grabbed it and hauled it up. Another disaster averted.

With the bookcase securely installed we moved on to more painting and knee wall trim. Since we don’t want to break with tradition, the knee wall trim is taking way more time than originally estimated. Waiting for paint, filler and glue to try is really slowing things down. However, dog cubby #1 is mostly complete with the exception of the tip out drawer and some final sanding and painting. Dog cubby #2 is well underway and is a bit easier now that we have a good idea about how we want it to go together.

So the key now is to get a stockpile of lumber and get it prepped. That way we can spend more time building and less time waiting for paint to dry.
Back bedroom
- Dog cubby baseboard (one done, one to go)
- Dog cubby outside trim
- Figure out knee wall design
- Knee wall door trim
-
Build/install bookcase - Install hangers for clothes
- Install drawer carcasses
- Install drawer boxes
- Install drawer trim
- Install baseboard
- Trim wall to ceiling corners
- Install conduit for ceiling fan
- Build new ceiling fan mount
- Install new ceiling fan
Front bedroom
-
Paint balcony door - Frame knee walls
- Trim knee walls
- Door for closet
- Drawers and doors for knee walls
- Install baseboard
- Install wall to ceiling corner trim
- Install conduit for ceiling fan
- Build new ceiling fan mount
- Install new ceiling fan
- Install grill cover for vent fan
- Install window blind

